
AI Rendering — Compositing a Background Photo with Your Drawing
This feature layers your changho drawing over a photo of the site and has AI composite the two into a realistic installed view. It follows the flow background image + lattice drawing = AI rendering, and the whole process happens in the right sidebar of the Se-sal studio.
Studio Layout
The Se-sal studio has three panels. AI rendering takes place in the right sidebar.
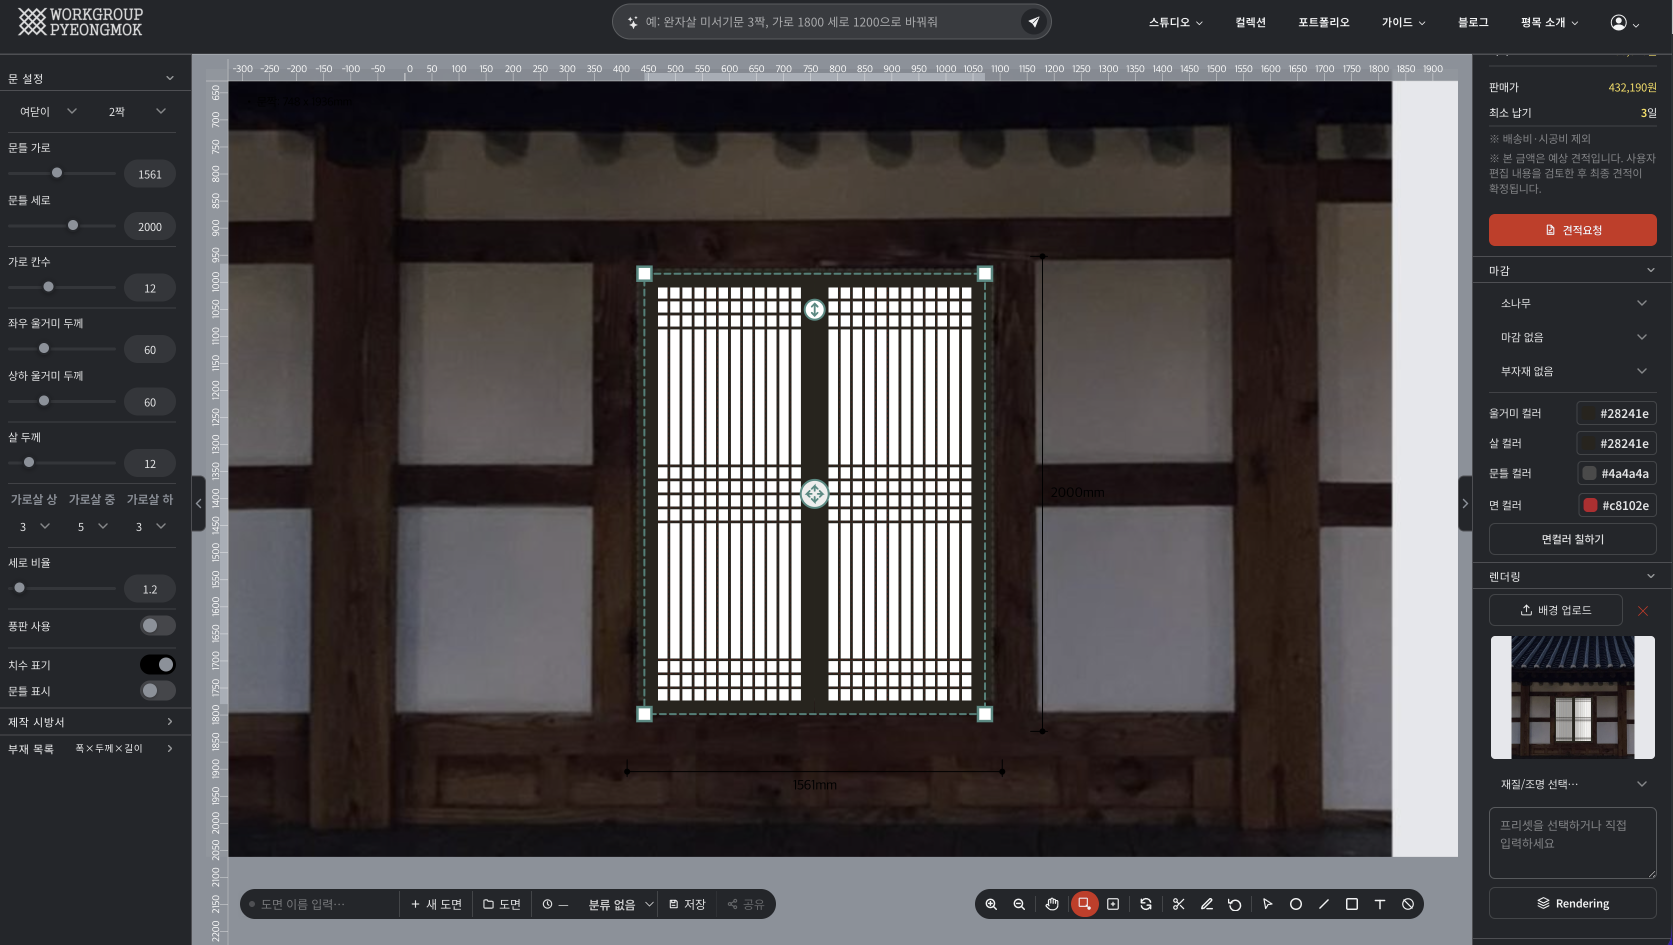
Step-by-Step
① Upload a background photo
- If the right sidebar is closed, click the › tab at the right edge of the canvas to open it.
-
Click the ↑ Add photo button and choose an image file.
You can upload several at once. - Uploaded photos appear in the thumbnail list below. Clicking a thumbnail applies it as the canvas background immediately. The selected thumbnail is outlined in green.
② Adjust the drawing parameters
Adjust the changho's dimensions and lattice settings in the left sidebar. Because the drawing is composited over the background photo live, you can judge the proportions and pattern against the real space on the spot.
- Width / height — match the actual installation space
- Horizontal slat layout (top/middle/bottom) — set each zone's cell ratio independently
- Frame and slat colors — set in the finish section of the right sidebar
③ Write the AI rendering prompt
Type the mood you want as a single line in the text field at the bottom of the right sidebar. The AI uses this text as a reference for the texture, lighting and atmosphere of the composite.
| Good prompt examples | Expected effect |
|---|---|
| Aged oak grain, lacquer finish, white hanji paper | Emphasizes wood texture and a hanji backdrop |
| Hanok café interior, warm daylight | A bright, warm sense of space |
| Night, soft indirect lighting, atmospheric restaurant | An evening mood |
| Traditional temple, serene natural surroundings, natural light | A still, quiet traditional feel |
| Modern minimal, white tones, large windows, city view | A clean, contemporary atmosphere |
For example: "hanok café" (space) + "oak grain" (material) + "daytime natural light" (lighting)
④ Run the render
- Click the ✨ Rendering button.
- An "AI rendering…" loading overlay appears on the canvas. Processing usually takes 30–90 seconds.
- When it finishes, the result popup opens automatically. Save the PNG with Download, or close the popup.
- Results are saved to your render history automatically. Click a thumbnail to view it again anytime.
Render History
Up to 9 recent results are kept automatically in the render history at the bottom of the right sidebar. Click a thumbnail to review or download it from the result popup. You can also remove an entry with its button.
Renders are stored on the server, so they appear the same on any device or browser as long as you're signed in to the same account.
Note that each account can keep at most 300 renders. Beyond that limit, new renders are refused with a notice — so clear out old ones with the button in the right sidebar's history, or back up the ones you need with Download.
Managing Background Photos
| Action | How |
|---|---|
| Add a background photo | The ↑ Add photo button in the right sidebar, or drag & drop |
| Switch background photo | Click a thumbnail — the canvas background changes to that photo immediately |
| Remove a background photo | Click the button beside the thumbnail |
| View the drawing without a background | Click the active thumbnail again to deactivate it |